How to Add Alert Overlays to Your Stream
When we decided to build an alert page we looked at the major alert providers and realized it's really hard to at a glimpse tell what an alert is going to look like, do or when things associated with it will happen.
With that said, I believe we ended up creating some super easy tools that can let streamers do quite a bit. So without further adieu, lets break down exactly what each section of our alert management tool does.
Oh yea- the page fully supports mobile too.
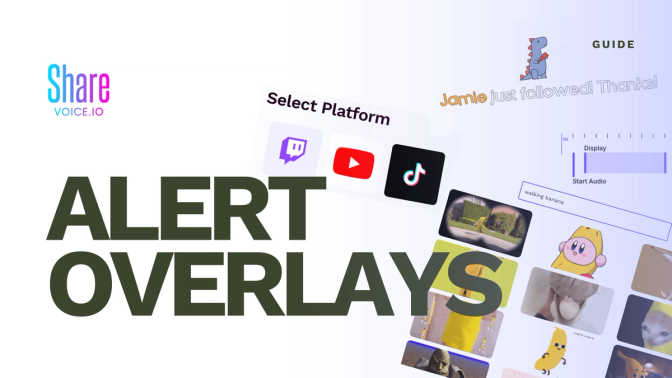
To get started at the bottom right you'll see a small grid icon. When clicked you can select the platform you wish to configure.
For each event type you're able to create "Reactions" which is just our fancy way of saying alerts.
You're currently able to add events, delete events, & disable events in this section. If you opt to have multiple events defined for a single event one will be randomly selected to play when the event occurs.
Ah I almost forgot! This is is one of the most important parts.
You can specify the triggers for specific reactions! So for instance if someone Super Chats $3 and someone else Super Chats $5 you define two different events for them!
The selected reaction is based on "best fit", meaning if you have a reaction for 100 bits, 200 bits, and 300 bits, and someone cheers 400 bits we will always select the 300 bits reaction. However if you have two 300 bits reactions, we will randomly select between the two reactions.
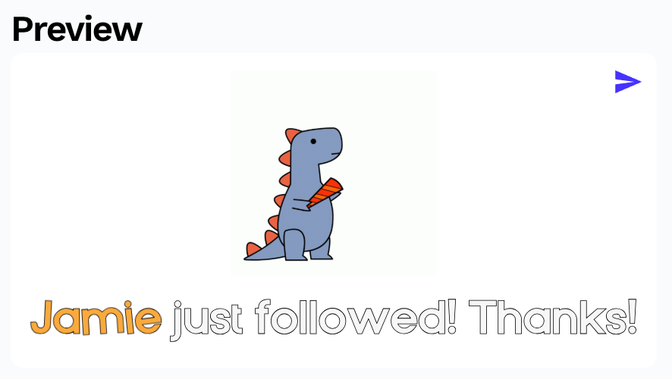
Great you're a master of managing events, now let's dig into the thing you're going to spend 80% of your time looking at. The panel which shows you what your notification looks like at a glance.
You can find your browser source on your settings page! We also wrote some guides on hooking up your browser source to OBS Studio or Streamlabs Desktop so check those out as needed.
If after sending a test message you're not seeing anything, make sure your activity feed is in Play if Okay or Never Review Anything mode.
And remember! When sending alert previews, if you're using dynamic sound this will use a message use, so while testing visual alert changes we recommend using static sound (we'll get into static & dynamic sound in the next section)!
This panel describes what you're going to hear when the alert fires.
Put simply, select a sound from our curated ever-growing sound library, or upload your own sound to use via the sounds dashboard.
Alternatively create a unique sound script which plays multiple sounds or voice cloned TTS (text to speech) when an reaction fires. This is useful for reading users' messages or other dynamic forms of data.
The dynamic or static toggle tells us whether we want to generate new audio every time this reaction plays (dynamic) or if you want to generate audio (static) now to get the perfect sound.
For more information on the Audio panel check out our in-depth guide on sound!
And of course if you don't want any audio, just slap that toggle at the top of the box to disable audio completely!
The overlay has quite a few things which may be customized and just like the Audio section we just talked about, at the top of the box you can hit the toggle to disable displaying any visuals for the reaction!
As you update this panel's details, you'll see your changes reflected in the Preview image. So make sure to keep your eyes glancing over that section as you make changes.
Message
This determines what exactly your alert's message is going to be! The message can contain event variables which we'll refer to as "special text", everything else is just "text".
Event variables can be written in the input box & are prefixed with "#".
Available event variables can be found by hovering on the information ⓘ icon on the input.
Media
Tapping "Select Media" will pop up a gif browser for you to search for a gif you'd like to display.
If you'd like to provide your own images you can use the Upload tab.
Font
This is the font to use for the displayed text.
Placement
This determines how to position the text relative to the display image.
Animation
This is the animation applied to variable text to make it stand out.
Color
You can modify the font's color, special word color & give your text an outline to help it pop on dark or light backgrounds.
User Message
If your Reaction's event type is one that may have a user message associated with it, you can optionally display that user message under your message by slapping the Show User Message toggle.
If you'd like the message to be read by a voice check out our sound alert guide's dynamic script section!
Ah the timeline, our pride & joy.
In other systems you have to manually enter the time at which certain things show up, how long they lasts and click around to adjust multiple aspects of your display.
Now all you have to do is drag your Display bar to last however long you like. Then drag it to whenever you'd like it to start.
The Start Audio line shows you when your audio will start playing.
This means coordinating between the start of your audio and the start of your display is extremely easy & at a glance it's simple to see how long your display will last & when your audio will start.
While it may be the end of this guide, it's just the beginning of your alert making journey...
🤦♀️
Anywho, with these 5 sections of functionality it's easy to imagine how complex or straightforward alert overlays can be. Get creative & let us see what you've made by joining the discord!